A useful pixel-style image often needs more than one click. You may like the AI redraw but want a cleaner transparent background, a smaller true pixel grid, or a larger export that stays crisp instead of becoming blurry.
AniPixel separates those jobs into a simple workflow:
- Use Pixelize to turn the source image into AI pixel art.
- Use Remove Background when the subject still needs a cleaner cutout.
- Use Fix Pixel Grid to recover the logical pixel size or export a sharp integer-scale copy.
Only the Pixelize generation uses credits. The two cleanup tools run locally in your browser, work without signing in, and do not spend credits.
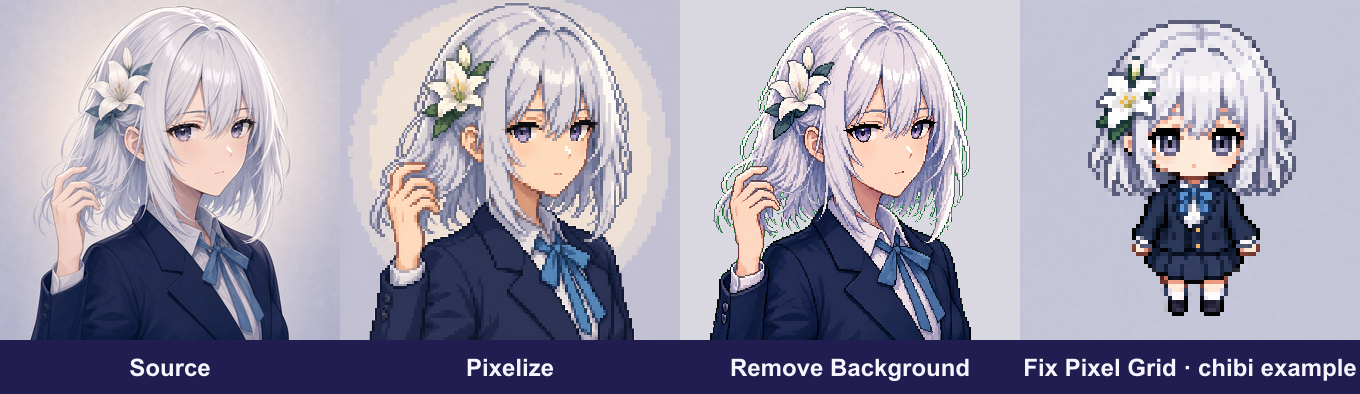
When should you use the complete workflow?
You do not need all three tools for every image. Stop as soon as the file meets its purpose.
- If the Pixelize result already has the right background and size, download it and stop.
- If the image needs a transparent cutout, continue to Remove Background.
- If the pixels become soft when displayed larger, or an AI pixel-style image contains many screen pixels inside each visible block, continue to Fix Pixel Grid.
This workflow is especially convenient for profile images, stickers, stream graphics, social posts, personal design experiments, and early sprite or game-themed concepts. A project with strict tile sizes, palette rules, animation frames, or engine-specific requirements will still need manual review and editing after export.
Before starting: use one controlled source
Most generation examples use one original, AI-generated white-haired AniPixel mascot. The Fix Pixel Grid section uses a separate chibi image whose small logical grid makes integer scaling easier to see. For your own test, choose one permitted image with a clear subject and save the untouched original.
If you use a real portrait, obtain permission from the person shown and avoid private or sensitive images. Pixelize sends uploads and related prompts to third-party AI providers. The cleanup tools run locally, but opening a Pixelize result through a task link still retrieves that stored result. See the Privacy Policy and Terms of Service.
Stage 1 — Generate the pixel-art direction in Pixelize
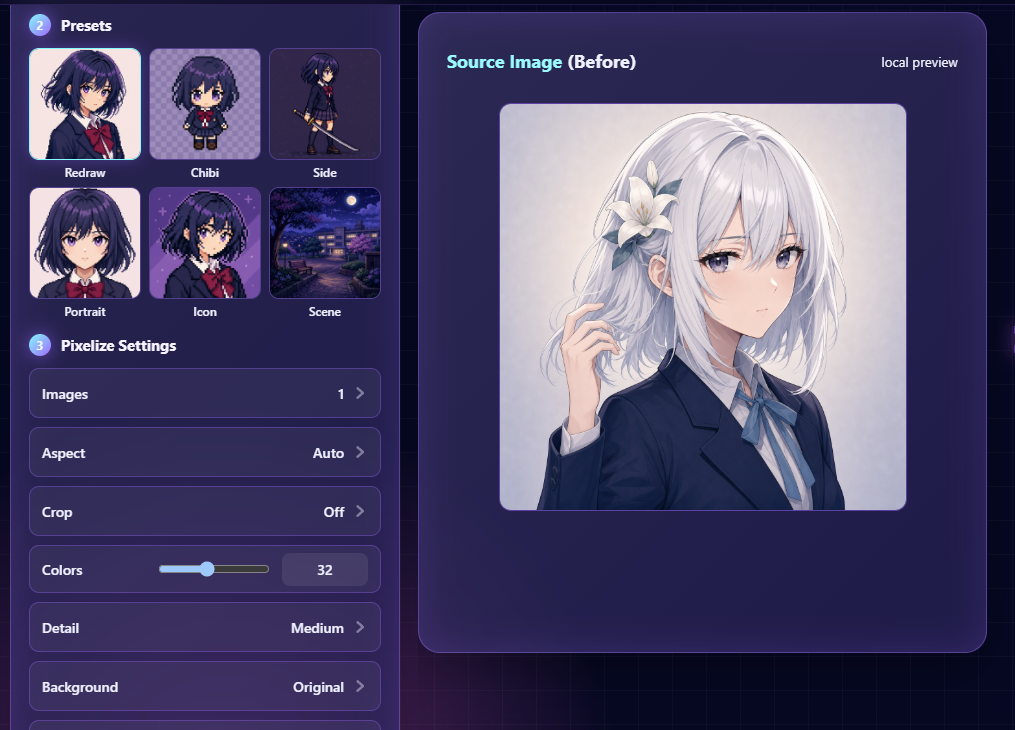
Open Pixelize, upload the source, and choose a preset. Redraw is the safest baseline when you want the composition to remain close to the input. Portrait or Icon can work well for a square character cutout.
Set the frame before adjusting small visual details:
- Choose the preset.
- Choose Auto or a destination-friendly aspect ratio.
- Crop closer if the subject is too small.
- Decide whether to request the original background, transparency, or a solid color.
- Generate one image first.
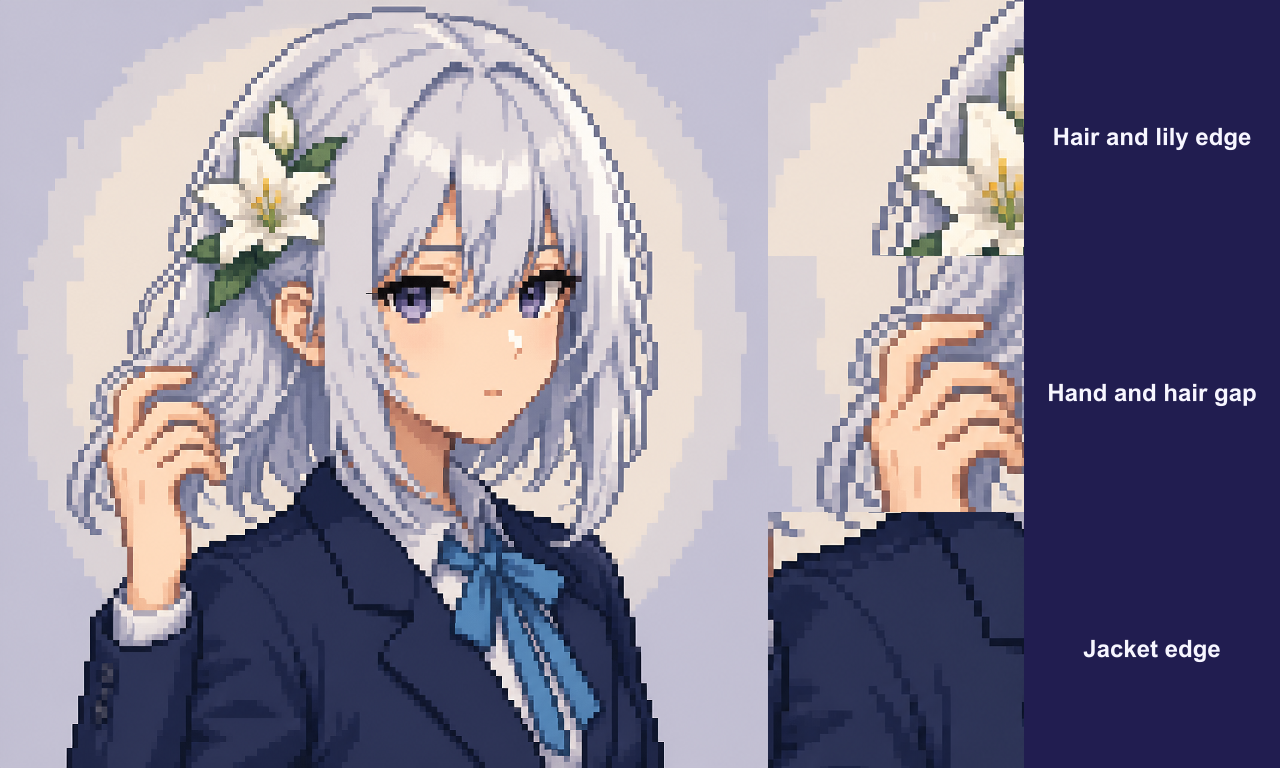
If you know that you want a cutout, requesting Transparent can save work. It is still worth checking the downloaded edge carefully. AI-generated alpha can leave small filled gaps, pale fringes, or missing details around hair and accessories. These are reasons to use cleanup, not reasons to discard an otherwise useful result.
Choose the Pixelize result before cleaning anything
Evaluate the generated image as a whole. Background tools can repair a cutout, but they cannot fix the wrong pose, an unsuitable crop, or an unreadable silhouette.
Keep a result when:
- The subject is recognizable at the size where you will use it.
- The framing and pose are useful.
- The main color groups are readable.
- Any background problem is limited enough to clean.
Regenerate or adjust the Pixelize setup when the composition itself is wrong. Each new result costs one credit, so it is better to correct the crop or preset before generating several variations.
Download the chosen result as PNG. Keep this untouched download as a recovery copy before opening any cleanup tool.
Stage 2 — Remove a flat or unwanted background
Open Remove Background. You can upload the downloaded Pixelize PNG, paste it, or follow the cleanup path offered from a compatible Pixelize result.
The tool is designed for solid-color and relatively uniform backgrounds. It is not a general semantic person-segmentation model. A flat backdrop gives it a clearer color boundary than a detailed room, landscape, or crowd.
Start with automatic cleanup
- Upload the chosen Pixelize PNG.
- Compare the Before and After previews.
- Start with Standard cleanup.
- Try Strict or Strong only if the first result keeps too much background or removes too much of the subject.
- Pan and zoom to inspect the entire silhouette.
Do not judge transparency only against the checkerboard. Check both a light and dark preview because pale fringes can disappear against one background and become obvious against another.
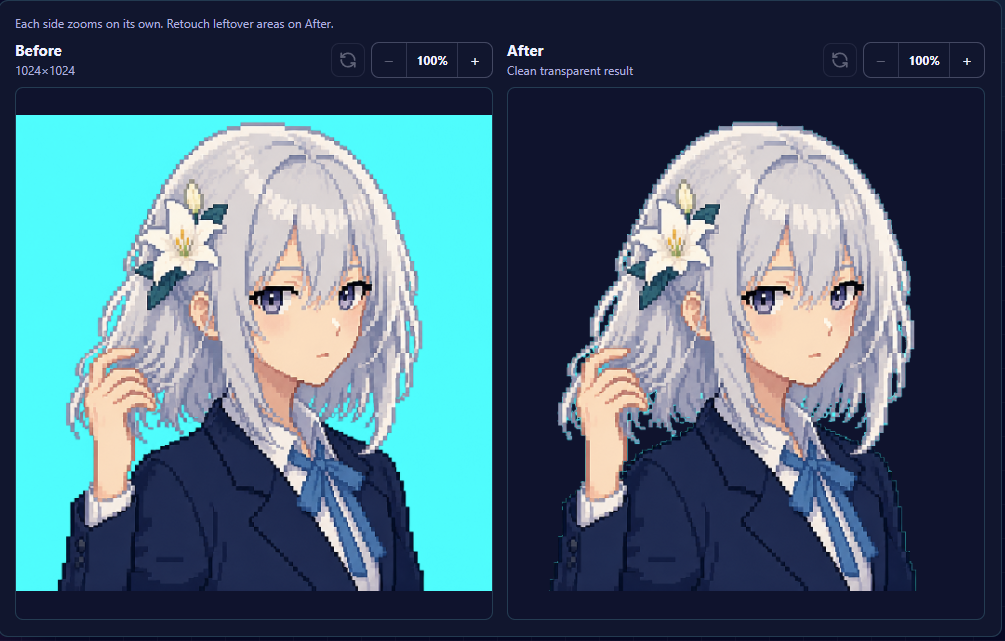
Correct difficult areas with Fine select
Use Fine select when automatic cleanup makes a localized mistake.
- Choose Remove for a remaining patch of background.
- Choose Keep when part of the subject was removed.
- Use same-color selection when the unwanted area shares a consistent color.
- Use undo immediately when a correction reaches too far.
- Use the eraser or local view controls for small finishing changes on the After preview.
Work from large corrections to small ones. First clear obvious background regions, then inspect hair tips, gaps between clothing and arms, and thin accessories. Repeatedly switching between Remove and Keep without a plan can create a ragged edge.
Fine select is optional. If the automatic result already has a clean silhouette, skip it and export. When correction is necessary, zoom into one problem area, make one small Keep or Remove adjustment, and compare the same edge before continuing. Several restrained corrections are easier to undo and judge than one broad selection across hair, clothing, and background at once.
Export the transparent file
Choose PNG when you need real transparency. JPG cannot store an alpha channel and will flatten the image onto a background. WEBP can support transparency, but PNG is the most predictable choice for a cutout that will enter another editor or tool.
Use a versioned name such as mascot-pixelize-cutout-v1.png. Keep the original Pixelize export beside it so you can repeat cleanup without regenerating.
Stage 3 — Recover or enlarge the pixel grid
An AI-generated pixel-art image may look blocky while still being a large file. For example, one visible “pixel” in the artwork might occupy several image pixels. Standard image resizing can then create soft edges or inconsistent block sizes.
Open Fix Pixel Grid and upload the cleaned PNG.
Choose a Working base:
- Smart grid when the tool detects a clear repeated cell size. The reported base is the recovered logical image size.
- As uploaded when detection is not useful or when the file is already a clean pixel grid and you only want integer scaling.
Then choose Export scale:
- 1× exports the working base at its true size.
- 2×, 3×, or 4× enlarge every logical pixel by an exact integer amount.
- Larger integer scales are useful when a tiny result needs to display on modern screens without ordinary smoothing.
Smart detection is a practical estimate, not proof that every block in the AI result follows a perfect grid. Inspect diagonal edges, eyes, hair, and transparency before accepting the detected base.
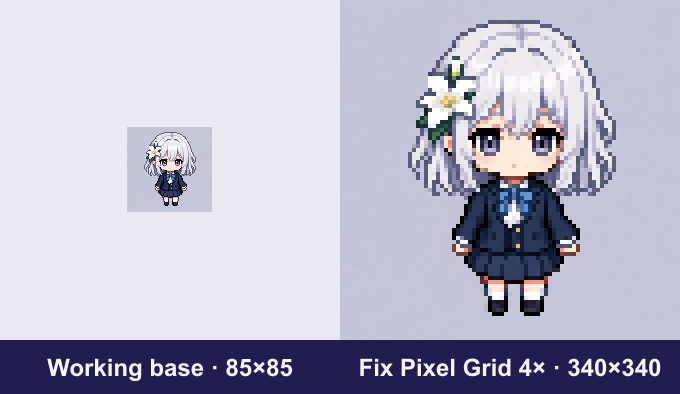
Why integer scaling stays crisp
Ordinary photo resizing estimates new colors between neighboring pixels. That interpolation is useful for photographs but softens the hard edges expected from pixel art.
Integer nearest-neighbor scaling repeats each source pixel as an exact square block. A 3× export turns one logical pixel into a 3 × 3 block without blending it with adjacent colors. That is why 2×, 3×, and 4× are safer display sizes than an arbitrary enlargement such as 250%.
This does not add new detail. It preserves the appearance of the existing grid at a larger display size.
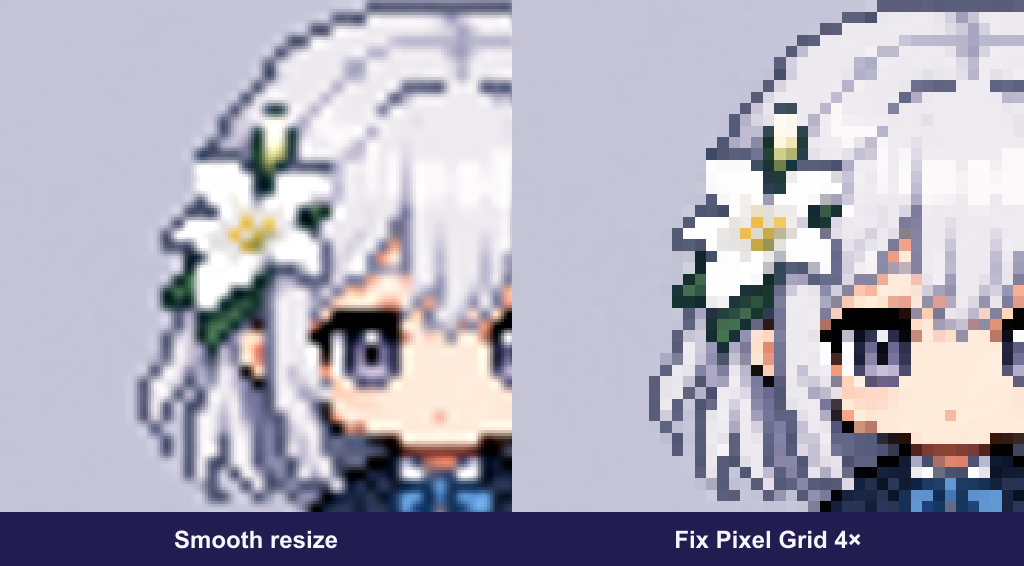
Final quality check
Before using the finished PNG, inspect it at both 100% and the intended display size.
- The silhouette is recognizable.
- The crop has comfortable space around important features.
- Transparent areas are truly transparent.
- No large background islands remain inside the subject.
- Hair, clothing, and accessory edges are not accidentally erased.
- The selected base grid looks consistent enough for the intended use.
- The export scale is an integer when crisp enlargement matters.
- The file opens correctly after download.
For an avatar or social image, visual readability may be enough. For a game-related concept, also verify exact canvas dimensions, engine import settings, palette requirements, licensing, and whether the asset needs manual cleanup or redraw.
Keep the workflow reversible
Save each stage as a separate file:
mascot-source.pngmascot-pixelize-redraw-01.pngmascot-pixelize-cutout-v1.pngmascot-pixelize-cutout-grid-4x.png
Separate versions let you redo background cleanup or scaling without spending another generation credit. They also make it easier to compare what each tool actually changed.
Start with the shortest path
Open Pixelize, generate one result, and stop if it already works. Add Remove Background only when the cutout needs help, then add Fix Pixel Grid only when the logical size or crisp export matters. The best workflow is the shortest one that produces a file you are happy to use.